Session 23: Creating a Photo Gallery with Mouse Events
Download this starter code to use during the session.
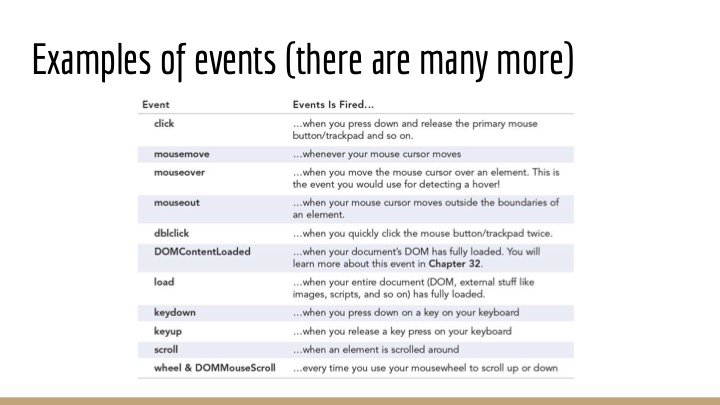
Review: Events and Event Listeners
Last time, we learned more about events on a web page and how we can use JavaScript to respond to them by programming the DOM. Then this week's reading reviews and expands on both topics.
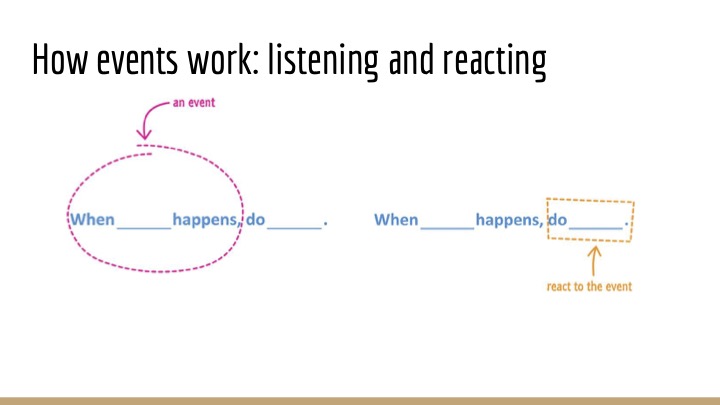
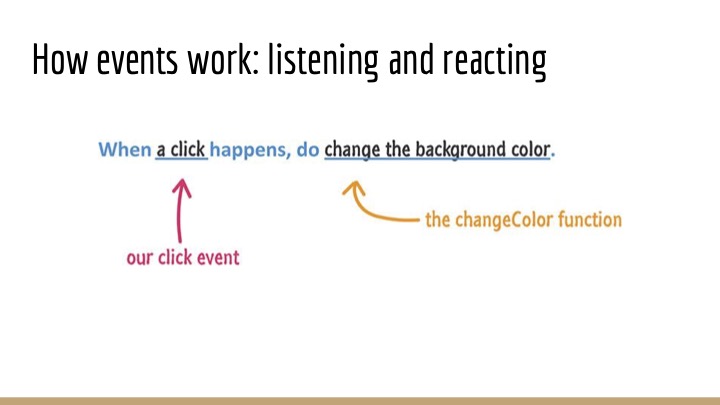
Events are all about listening and reacting.
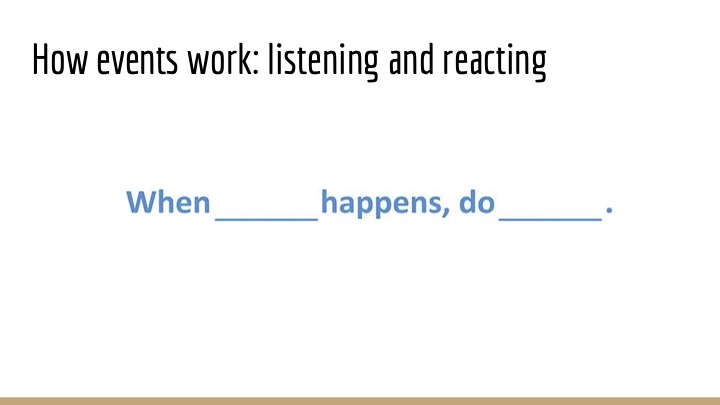
Let's get more practice.
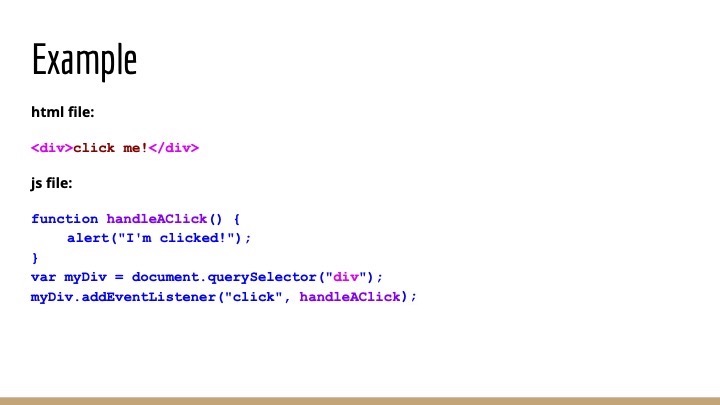
A Lab Exercise: Mouseover Events with Images
There is so much to learn. It is more fun to do than to watch or to listen!
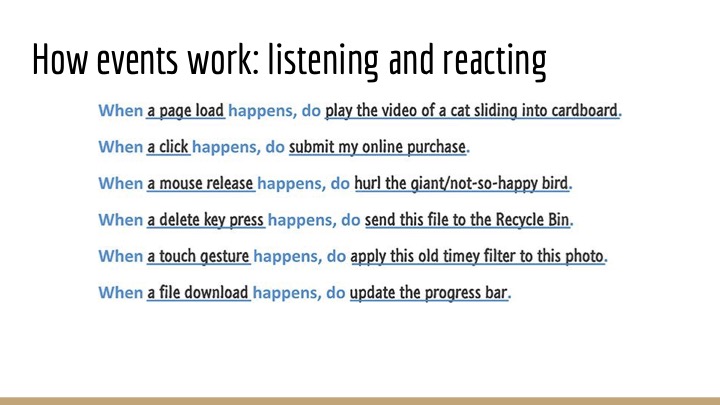
Some of the popular effects you may have seen on the web involve images. In one, mousing over an image causes it to expand or change. In another, clicking a button causes a new image to appear.
Your code will give users the ability to view different images in a photo gallery.
Open the photo-gallery folder
in your starter code and use it to begin the exercise.
NOTE: At the end of the session, you will submit the code you create for review.
Here are possible solutions:
Debugging advice: If a script is not behaving as you expect, or doing anything at all, open the console. When there is an error in a script, the browser will often write an error message to the console.
Creating an HTML Element in JavaScript
Next session, we will turn our attention to a different sort of JavaScript programming.
Even without an event in the browser, we can use JavaScript to generate HTML elements and add them to a page. We might prefer this approach to writing HTML by hand when the element, often a list or a table, is long and tedious to create.
We just saw an example in our photo gallery web page, in the
div with the anchors and images. All the
hrefs and srcs are the same except
for the numbers, and the href and src
on any given line are the same except for the "L-" that
indicates full-size (large) images.
Let's review something we saw and read about recently and use it generate HTML elements.
Consider this page. It has a table, but no rows or columns. Let's add them! For simplicity, let's make a table of squares for the numbers 1 through 10. The first column will be the number i, and the second will be the number i2.
let tbl = document.querySelector("#mytable");
for(i = 1; i <= 10; i++) {
  let row = document.createElement("tr");

  let cell1 = document.createElement("td");
  cell1.innerText = i;
  row.appendChild(cell1);

  let cell2 = document.createElement("td");
  cell2.innerText = i*i;
  row.appendChild(cell2);

  tbl.appendChild(row);
}
How can we improve on this solution?
-
We could add a header row or even a
theadelement, to give information about the table.
Try this out at home! - There are two sets of lines duplicated in the script. That creates a risk of error: if we decide to change the code that creates a table element, we have to remember to change it in two places. It also gives us an opportunity to write a function to perform their task: to make a cell and add it to the row.
Here is how we might implement the function:
function addCell(row, value) {
  let cell = document.createElement("td");
  cell.innerText = value;
  row.appendChild(cell);
}
...
let row = document.createElement("tr");
addCell(row, i);
addCell(row, i*i);
tbl.appendChild(row);
You are learning some powerful tools. This is fun!
We'll put these ideas to use next time to generate HTML elements that would be even less fun to write by hand.
Closing
Homework 10 is available. It asks you to practice write functions and scripts that modify a web page. This is our last weekly homework assignment.
In our next two sessions, we will see more on how to use JavaScript to create elements for web pages and more on events that our scripts can handle. Midterm Exam 2 is three sessions from now, on Thursday, November 21.