Session 22: Adding Randomness and Scrolling to a Web Page
also: More Events and the DOM
Download this starter code to use throughout the session.
Exercise 1: What Can Go Wrong?
We have been learning how to write loops, code that repeats
actions. There are
two kinds of loop,
definite and indefinite. The while statement
is JavaScript's primary tool for writing indefinite loops. We
can use it to write definite loops, too, but JavaScript provides
a tool specifically for writing definite loops, the
for statement:
for (initialize; loop test; change) {
  // execute these statements
}
The first line of a for statement brings together
in one place the three necessary actions involving the sentinel
variable:
- The first expression initializes the sentinel variable before the loop starts.
- The second is the loop test, which checks the value of the sentinel to see if the loop needs to execute again.
- The third changes the value of the sentinel. In a standard counted, this increments (adds one to) the sentinel. In other case, it adds more than one or even subtracts from the value.
Each of these parts is important.
What's the problem with this code?
The loop never changes the value ofx. It will
always be 0, so the loop never ends.
let x = 0;
while (x < 10) {
  console.log("x = " + x);
}
What about this code?
The loop changes the value ofi, but the change
does not approach the stopping condition. It will always be
>= 0, so the loop never ends.
for (let i=0; i>=0; i++) {
  console.log("i = " + i);
}
These are infinite loops: they go on forever, and will crash your browser.
It is essential that the loop change the value of the sentinel each time through the loop — or at least have the chance to do so. The change must approach the stopping condition.
Take care when writing loops. This is one motivation for the
for statement: to bring the changes together so
that we can see them at once.
This is another reason you might want to use a
forEach whenever you can. It lets you focus on
processing individual elements in the collection, leaving the
work of managing the loop's details to JavaScript.
Exercise 2: Color All Cells in a Table
This web page
contains a table that looks boring. Let's use a
for loop to spice it up by modifying its cells.
Open the empty
script.js file
in the course-schedule directory.
Reload the page to see the result. Then:
Modify the script so that it changes the background color of every cell to aqua.
Reload the page to see the result.
How might we change to cell to a random color?
~~~~~~~~~~~~~~~~~~~~
Here is a possible solution.
let cells = document.querySelectorAll("td");
for (let i=0; i < cells.length; i++) {
  let cell = cells[i];
  cell.innerText = "Cell " + i;
  cell.style.backgroundColor = "aqua";
}
If you write for loops for a while, this sort of
code will begin to look very familiar, as it is a standard way
to process every cell in a table, every item in a list, or every
paragraph in a document.
Changing the background color of every cell to aqua is something we could do in CSS. But JavaScript gives us the power to style a page in a way that we cannot implement (easily) in HTML and CSS.
Copy the file
random-color.js
from other-files/ into the course schedule folder.
It contains a getRandomColor() function that
creates a random color using the Math object's
random() method.
To use the function, let's load the script into the HTML document:
<script src="random-color.js" type="text/javascript"></script>
... and change the color line in our cell-coloring script:
cell.style.backgroundColor = randomColor();
... and reload the page. Refresh the browser several more times. You can't do that in HTML and vanilla CSS.
Do you want to experiment with colors? Look inside the
randomColor() function again. You can modify its
behavior by changing the 255s to something else. You will want
to keep each of the random numbers between 0 and 255, of course,
as 0-255 is the legal range for the component values. You can
make the function create very different colors!
- Would you like only shades of red? Change 255 to 0 for both the green and blue components.
- Are you a Prince fan who wants a purple page? Change 255 to 0 for the green component.
- In honor of the complexity of life, would you like only shades of gray? Use the same random value for all three components!
Creating Dynamic Web Pages
The web provides a rich interface to access and control what happens in a web page. Through that interface, we can use JavaScript to make a page dynamic.
As we have seen, the HTML for a web page is transformed into a
DOM tree. The tree is made of nodes, such as a body
or a div. Many nodes have children, that is, they contain
other nodes. Even an element such as
<p>This is a paragraph ...</p>
is a little tree: a p node that contains a text
element.
Some pages, such as today's session notes, are static. They exist in the browser just as they do on the server that delivered them. They never change.
But consider https://www.worldometers.info . This is a dynamic page: the text is always changing!
We can see the difference between static and dynamic elements by noodling in the console. Here's one of the static parts of the page:
document.querySelector('.counter-title-top')
document.querySelector('.counter-title-top').innerText
document.querySelector('.counter-title-top').innerText = 'Eugene was here'
Next, hover over the "Current World Population" section, then
click on the [+]. These are dynamic behaviors of
the sort we have implemented before, one in CSS and one in
JavaScript, driven by user actions.
Then there is the population itself, which is constantly changing without any user interaction. It is purely dynamic.
Both static and dynamic pages have DOM trees. The source view shows us the static tree; the inspector shows us the dynamic tree, the parsed version!
Have we ruined the page for everyone? No! We are programming on the client. Reload the page to see the page produced by the server.
Let's try another:
let images = document.querySelectorAll('img');
images
let firstImg = images[0];
firstImg
firstImg.getAttribute('src')
firstImg.setAttribute('width', '100');
firstImg.setAttribute('src', image URL);
firstImg.setAttribute('width', '200')
We have been doing this in the console with an existing page. Creating dynamic pages means using these ideas when we create pages. We will write JavaScript in a script that is part of a page. When the page loads, the code runs and makes the page!
What all can our scripts do? Many things, including respond to events and generate HTML for the page. Knowing how to write functions and how to work with objects, we are ready to write code that handles events.
Working with Events
Next week's reading introduces event-driven programming. In this mode, the user of a web page takes an action, and the web page responds. The web browser can respond to other kinds of events, too, such as the loading of an image or a page, or the receipt of data from a sensor.
In event-driven programming, most of our code becomes event handlers: functions created to respond to specific events. The rest tells the browser about our functions and does a little bookkeeping.
The reading uses a light switch analogy to illustrate event-driven programming. A surprising amount of the work done in our world can be understood through the lens of events and event handlers.
Back in Session 18, we saw our first simple example of a button and an event handler.
Recall the structure of the code, which we have since replicated in other pages:
- There is a button element that can generate an event.
- The script has two parts: a function, and code that uses the function.
- The function changes the page's text content and styling.
-
When the function is called, it is given one piece of
information: an event object. The function parameter,
e, is the name the function will use to refer to the event object. In this case, though, the event is ignored by the function. We consider event parameters more below. - The code after the function connects the function to the button.
We say that the function is an event handler, and and the code after the function registers the function with the button.
This code registers an event handler with the browser by setting a property of the element directly:
element.onevent = function;

button.onclick = respondToClick;
Elements also have a more general
addEventListener() that can be used to register a
handler:
element.addEventListener('event', function);

button.addEventListener('click', respondToClick);
Using the method enables us to add more than one listener to the same component. For example:
function logData(e) {
  console.log(new Date().toLocaleTimeString());
}

button.addEventListener('click', logData);
Sometimes, we want to create a single event handler and don't care about its name. In these cases, we can define the function 'in place', almost like a literal value:
button.onclick = function(e) {
  document.body.style.backgroundColor = "lightblue";
  document.body.innerHTML = "<h1>I am a little blue today</h1>";
};
You can use this style when appropriate, if you like. You will definitely want to recognize it when you see it in other web pages.
The respondToClick() function does not need to use
the event object it was given, so the function ignores it. But
there are many functions in which the event object helps it do
its job.
We saw one in our Session 20 lab, in which the web page displayed the coordinates of the mouse as the user moved it.
In our example, the function could use the event to help it change the text on the button after it is clicked:
let heading = document.querySelector('h1');
heading.innerHTML = "<h1>I am a little blue today</h1>";

let btn = e.target;
btn.innerText = "You clicked Me!";
Why ask the event for a reference to the button, rather access the HTML directly? There could be more than one button!
We will do more with events and event handlers in the next session.
Programming the DOM
We have already used JavaScript to program against the DOM in several ways. Let's recall them and see a few more.
Finding Elements
The main way we have been finding elements is by using the
querySelector() method, and more recently
querySelectorAll().
document also has several data properties, such
as body. Two useful ones are
links and images. Try these on
the Unsplash search page for Cedar Falls.
We can use querySelector() on any
element, not just document. For example, NEED
NEW EXAMPLE:
...
Creating and Adding Elements
We can create new HTML elements and add them to the DOM using JavaScript. Try the following on our simple button-plus-event handler page:
let newP = document.createElement('p');
newP.innerHTML = 'This text was added by <strong>JavaScript</strong> code.';
document.body.appendChild(newP);
Here is
the final version
of our file. We will see createElement() and
appendChild() again next week when we use
JavaScript to build a table for us from spreadsheet data.
Working with Elements
In Session 18, we learned that we can manage an element's
attributes using the hasAttribute(),
getAttribute(), setAttribute(),
and removeAttribute() methods.
There are a few more things that we can do with elements once
we have found or created them. One is to ask an element to
scrollIntoView().
Open the console on this copy of Reading 2 and try this:
let e = document.querySelector('#examples');
e.scrollIntoView();
This can be handy for letting the user 'jump' to part of a page using an action, or for bringing new elements into view.
Let's add an an image to the page via its scripts file:
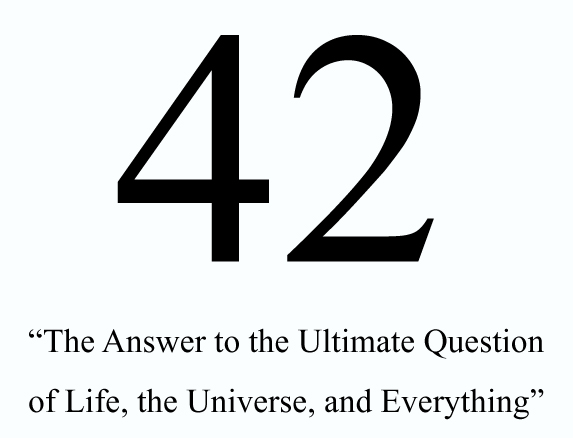
// create an image element
let newImageElement = document.createElement('img');

// set its attributes
newImageElement.setAttribute('src', 'answer-is-42.jpg');
newImageElement.setAttribute('alt', 'the answer to life, the universe, and everything');
newImageElement.setAttribute('width', '200');

// insert the image into the document
let loc = document.querySelector('#basic-html5-document');
loc.appendChild(newImageElement);

// make sure the new image is visible
newImageElement.scrollIntoView();
Here's the code in
a script file.
This example shows that we can append a new element to another
element, not just to the end of the body. It also shows the
scrollIntoView() method again.
Credit: the 42 image is form Wikimedia , with a Creative Commons Attribution 3.0 Unported license.
Closing
Homework 9 asks you to
write more JavaScript, including functions and if
statements. It is due tomorrow.
Homework 10 will ask you to write more JavaScript, especially loops and functions. Watch for it in the next two days.