Session 6: Working with Tables & Media
Recap: Semantic Elements
Last time, we revisited the distinction between inline elements and block elements and then focused on HTML's grouping elements for organizing documents. These elements give us a way to indicate the purpose of each component in a document, from header to main content to footer. They make up the semantic markup that is HTML's greatest strength.
Semantic markup makes it possible for tools to present our documents more effectively to users: browsers, screen readers, other devices. This improves the accessibility of our pages to the full range of users. It also makes our pages easier to present well on devices of different sizes — and even if those devices don't exist yet!
I didn't choose to use<article>and [other semantic markup elements] because I wanted to support the Apple Watch; I did it before the Apple Watch existed, in order that my code is future-proof. By choosing the right semantics now, a machine that I don't know about yet can understand my content and display it in the best way for its users.
— https://www.brucelawson.co.uk/2018/the-practical-value-of-semantic-html/
Today we turn to two final bits of HTML that serve specific semantic purposes: tables and multimedia (images and sounds).
Let's create a new document from scratch using our template HTML file that we can use to see tables and media in action. We'll name our file demo.html .
Download this starter code so that you can follow along and try the same things that I try in class.
Working with Tabular Data
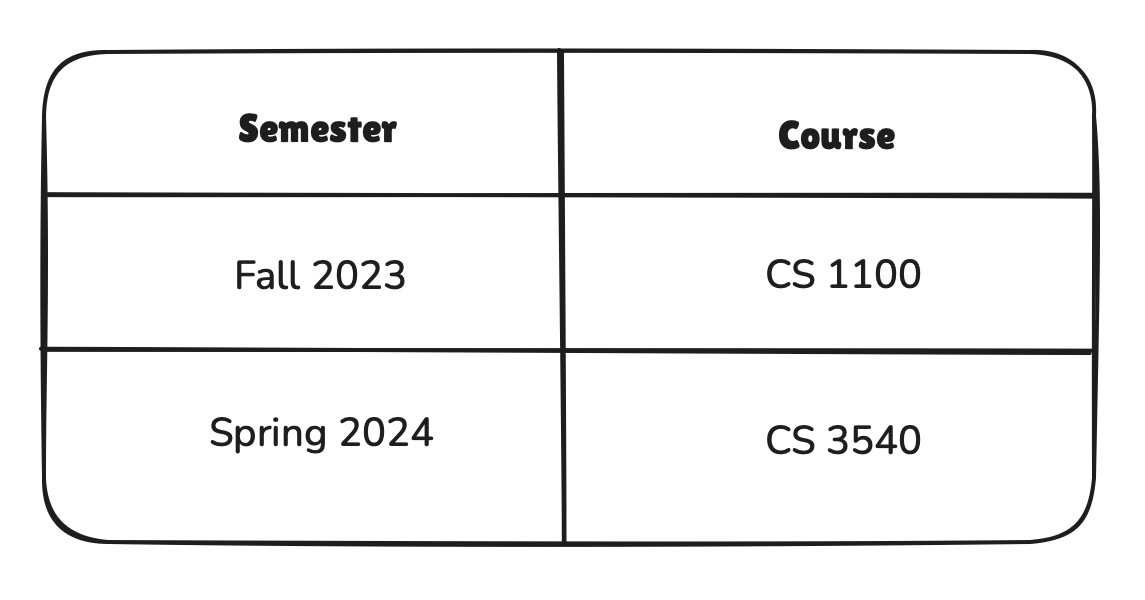
Suppose I wanted to make a table showing the courses I taught during the 2023-2024 school year: CS 1100 in Fall 2023 and CS 3540 in Spring 2024. It might look something like this:
The block-level HTML <table> element is
perfect for this. Tables are not difficult to learn and use,
but they do have a lot of different parts, to support the many
ways that people like to present tabular data.
A table is made up of rows: tr.
A tr is made up of columns, with each cell
holding table data: td.
Make HTML tables readable as code: use the same kind of indentation with multiple-line elements that we use with other compound elements. This makes the code easier to understand and easier to edit later.
We use the th element to create headings for our
columns, to explain to the reader the meaning of the column.
Notice how the browser renders headings differently.
With those basic elements, we are ready to create a more interesting table.
Let's build a page that communicates information about cities in Iowa. I'm going to work with some Iowa population data available at https://worldpopulationreview.com/states/cities/iowa We'd like to present this data in an attractive, easily digested way.
Let's start building my demonstration table of population data. I want to have three columns: city name, 2024 population, and rank in state. I want to have four rows: one for Des Moines and one for each of the state universities' home towns.
... build one row of the body; copy-and-paste the rest
As tables get larger, the table element gets larger and harder to read. Just as with the web page itself, we can create headers and footers.
-
a
theadwithtrs ofth -
a
tbodywithtrs oftd -
a
tfootwithtrs of table data
Across the top of the table, I'd like a header row with column headers.
Across the bottom of the table, I'd like to credit the source of my data and link to their website. In the footer, I'll create a row with that information.
The label will be wider than any of the columns and does not
belong to any of them, so I'd like the row to span across the
entire table. To do this, we can use the colspan
attribute: colspan="3". (There is also a
rowspan attribute, which you can see used in the
table on the course home page.)
Finally, I'd also like for my table to have a title that names
the table as a whole. We can use a caption
element for this purpose.
Look at the table... It's not very pretty. Always remember: HTML is about structure, not appearance. A table is for organizing data, not for determing its appearance. (This is ironic, because for many years early web developers used tables for layout.)
We can use CSS to make a table look like anything we want.
... link to a simple table stylesheet as an example
Next week, we begin our study of CSS in earnest and will write our own style sheets for tables and everything else in HTML!
Finally: It can be tedious to format data in an HTML table.
Imagine if we wanted our table to include twenty Iowa cities,
or one hundred... Sometimes, we can generate HTML for data we
have in another format, such as CSV and JSON. The World
Population Review page provided links to datafiles in both of
those formats. Later in the semester, we will learn JavaScript,
which we can use to generate a table from such a
data file.
Exercise
None today.
Working with Images
Now let's add some media to our page, starting with an image.
We have already used images in some of our files, using the
img tag with src, width,
and alt attributes. This week's reading contains
more about images.
I searched for an image of Cedar Falls that I'd like to use as
a header for my file:
https://commons.wikimedia.org/wiki/File:Downtown_Cedar_Falls_IA_pic1.jpg
Before using an image in one of your pages, make sure that you have a right to use the image.
My Far Side story.
How can we know if an image is available for use?
Many sites include licensing information for us. Consider the image I found on Wikimedia. If we scroll down the page, we see a section titled "Licensing" which tells us under what conditions we can use the image.
If you look for images using Google Image search, you have the ability to focus your search on images with specific kinds of licenses, by clicking Tools and then Usage Rights.
Discuss Creative Commons Licensing and conditions.
Download an image. Choose smallest possible, for size and bandwidth.
Add an image to the page
As we've seen: Use empty <img> element with a
<src> attribute. We'd also like to some text
to describe the image, for case when the image doesn't load or
when the viewer is using a screen reader for accessibility.
... do it ...
Give credit to the source
We must cite the source of materials we use, and often the license under which we use them. Sources such as Wikimedia and Unsplash will even give us text or HTML for an attribution line. In any case, we want to attach credit for our sources to our image.
A convenient way to do this in HTML is to wrap our image element
in a
figure
element. Figures include a figcaption element to
give a caption to a photo. The figure element
creates a single unit out of the image and its caption, ensuring
that the two pieces of information are seen and processed
together. This is helpful to people who read and edit the HTML
file (ourselves included) and to browsers.
There we have it, a nice header image, with proper attribution.
Working with Video and Audio
The video and audio elements enable us
to embed sounds and video in our pages. At their simplest, they
work much the same as images, including the src and
width attributes. We also cite our source, perhaps
using a caption element to do so.
The video element also supports three empty
attributes:
controls, to show user controlsautoplay, to play the video on loadmuted, to mute the video on load
Add a video
I will use a video created specifically for the Department of Computer Science, so I have the right to use it.
<video src="computer-science.mp4" width="320" controls muted>
</video>
Supporting Alternate File Types
Some media files are quite large, so we may want to use a compressed file format to reduce the bandwidth. But not all devices support all of the latest formats. What can we do? HTML offers media elements that enable the browser to select the best file for the situation.
Converting images to other formats: If you have a large image and would like to create smaller versions for us on the web, you have many choices, including tools on your own operating system. If you would like access to even more options, there are tools on the web. https://squoosh.app/ is an online editor for manipulating images and creating copies in different formats.
Determining which browsers support which file types: If you have a file type and aren't sure if it is supported by the standard browsers, try https://caniuse.com. It is a site that helps us see whether browsers support different file types and even features of HTML, CSS, and JavaScript.
Add an image with alternative versions
We can use a
picture element
to offer the browser multiple versions of an image. A
picture contains zero or more source
elements and an img element that specify
alternative versions of the file. The img element
describes the size and other attributes of the image, as well as
providing the default version of the file.
<picture>
    <source srcset="images/1024px-Downtown_Cedar_Falls_IA_pic1.avif" type="image/avif">
    <source srcset="images/1024px-Downtown_Cedar_Falls_IA_pic1.webp" type="image/webp">
    <img
      src="images/1024px-Downtown_Cedar_Falls_IA_pic1.jpg"
      width="300"
      alt="storefronts at the corner of 4th and Main in downtown Cedar Falls"
    >
</picture>
As you saw in this week's reading, there are similar elements for offering alternative versions of audio and video files, too.
For simple websites, we won't always want to do this. If we prefer the most common image types, we won't need it either. However, this is a nice tool to have when we have large media files and want to make our websites load faster.
Closing
These pages don't look good, and they don't look the way the originals do. Keep in mind: With HTML, we are creating the structure and content of the pages, not their appearance.
Even without styling, data and media make our pages richer for users.
That is, for the most part, HTML. There is more, some of which we will learn in passing over the coming weeks. But we have now seen enough HTML to be able to create well-structured pages with text, data, and multimedia.
Next week, we move our focus to layout with CSS. I'm guessing that may of you are psyched. I know I am.
Homework 2 is due tomorrow. Homework 3 will become available then as well.