Session 4: Common HTML Elements
Download this starter code. You can use these files throughout the session to follow along and do the same work that I demo.
The Structure of a Basic HTML Document
Last time we used a basic web page to learn some of the top-level features of an HTML document:
- a
<!doctype>element - an
<html>element
The <html> element contains two elements:
-
a
<head>containing information about the page, and -
a
<body>containing the content of the page.
Each of these in turn contains other elements. The head contains information about the document, including its character set and its title. The body defines the content and structure of the document.
At this point, we are not concerned with the appearance of the document, including such features as the fonts, the size of the text, and the spacing. We will rely on the browser's default ways of presenting each element. (In a few cases, we may define a little CSS for fun and to punch up a dull element.)
Creating a Practice File
Let's build a new document from scratch. We can make a copy of this template document. Let's name the new file demo.html.
Let's use our new document as a playground to explore the most common HTML elements and how they work together in a web page. This document won't be meaningful; its sole purpose is to be our playground.
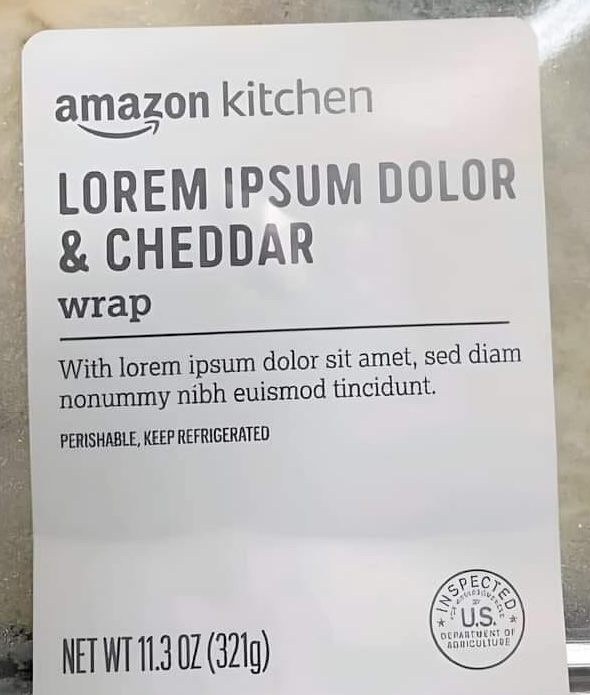
forgot to proofread the copy
before printing the label...
While learning HTML, you may find the MDN Element Reference helpful. It is listed on the Resources page as well.
Because we don't care about the content of the document, let's not spend time writing placeholder text. There are a number of websites that will produce gibberish text for us. This will allow us to focus on the elements we are learning and on the design without being tempted to read the text.
I'll use the Lorem Ipsum generator, which produces standard dummy text that has been the standard in the print industry since the 1500s. (You can read more about the history on the landing page, if you like.) I have added a link to it to the Resources page as well.
Generate four paragraphs of lorem ipsum and paste into the new HTML document.
Adding Common HTML Elements to the Document
Recall that text such as this pasted into the document will appear as an undifferentiated blob in the browser, with no structure.
Add an h1 tag. Headers enable us to show the
hierarchical nature of the content. The markup expresses the
structure of the document. The h1 element names
the page's root element.
Add some p tags. Now we see the separation of
paragraphs. The markup expresses the structure of the document.
When we speak and write, some words carry different weight than
others. The em and strong tags allow
us to stress words and phrases. By default, most browsers
italicize the content of em elements and
bold the content of strong
elements.
Notice a difference between how the browser treats
p tags, on the one hand, and em and
strong on the other. A paragraph is a
block element, denoting a chunk of text with
its own vertical space. The other two are
inline elements, denoting a piece of text that
exists within the flow of the document. We will see this
distinction many times as we learn and use more HTML tags, and
then again when we learn how to lay out documents using CSS.
Many HTML tags define a kind of text. What other kinds of text can we use?
We can indicate that text is an address using an
address element.
If we want to show that an address has multiple lines, we can
use br tags.
The time tag lets us mark text as referring to
dates and times. The datetime attribute supports
dates and times in many formats, including yyyy-mm-dd and 12:30
and even durations. The text in the element can be anything,
including an absolute date/time or a relative expression such
as "tomorrow" or "in one hour".
These tags are not used as often as many others, but they are great examples of how HTML mark-up enables us to give more meaning to text. By default, the content displayed on the page appears as regular text. However, the semantic markup embeds meaning in the document. This enables us to style addresses and times to appear differently, if we want, and enables screen readers to highlight this content.
Another neat example of this is an abbreviation. We often use
acronyms and other abbreviations in our documents. Our code can
embed this meaning with an abbr tag. The
title attribute defines the full meaning of the
abbreviation. Consider this text that uses an
abbr tag:
CSS.
When we hover over the abbreviation in the rendered page, the
browser can show the reader what the abbreviation stands for!
I will start using this for you in my reading and notes pages.
I use the code tag frequently in the course web
pages. It indicates that a piece of text is computer code in
some language. (For us, that will usually be HTML, CSS, or
JavaScript.) Browsers render code elements in a
monospaced font, and my stylesheet tells the browser to add a
box and background color, to make the code stand out.
What other kinds of text are there?
Subscripts and superscripts: H2O, x4
Quotations:
- inline, with
q - set apart, with
blockquote
Most browsers add quotation marks to inline quotes by default,
but by marking them our stylesheets can display them any way we
like. By default, browsers indent blockquotes. We can indicate
the source of the either kind of quotation with a
cite element:
Do stuff, or talk about stuff, but don't talk about doing stuff. — Kent Beck
Lists:
- unordered, with
ul - ordered, with
ol
Unordered lists are labeled with bullets. By default, ordered
lists are labeled with numerals. We can change the kind of
label with the type attribute, for example,
type="A" or type="i".
Hyperlinks are the reason for the web. We create them using
the a tag to create an anchor. The
href attribute gives the address for the link.
Notice how the browser renders links differently from other
text: the cursor changes from an eyebeam for selecting
text to a hand for following the link.
We can use three kinds of links:
-
an absolute URL that gives the full address
to the resource, such as
https://fever.wnba.com/. My links to MDN resources are absolute. -
a relative URL
that gives the address of the resource in relation to the current page's location
... show a file in the same folder, a subfolder, the containing folder, a parallel folder
My session notes use all four kinds of relative URL. -
an
idin a page, either an element in the same page or a deep link into another page. The syllabus uses the former its nav menu up top, and the session notes sometimes use the latter.
Finally, HTML also provides elements for media other than text.
We can include images in our pages with the img
tag and the src attribute.
- ... show bare img
- ... show invalid src
- ... show valid remote src
- ... show valid local src
My sample photo is from https://unsplash.com/photos/VIW3TOYklW4
Each browser has a default placement and size for images. HTML
provides width and height attributes
for controlling the size. We should generally use one or other,
but not both, or we will likely distort the image. We will, of
course, control placement and styling later with CSS.
An Exercise
Now you try some of your newly-learned HTML:
Recreate the structure of the top of the Homework 1 web page.
To jump-start past the boilerplate, the starter code includes this template file and this text file with the first few elements and paragraphs from the assignment page.
After the exercise: You might generate something
like this:
exercise.html
What was easy? What was hard? What did you want to do that we haven't learned yet?
Complementary Skill: Validating HTML
Learning to write proper and correct HTML takes practice. There are many different elements, and most of them have attributes that we have to get used to, too.
Browsers are fairly generous in what they will accept. Even if an HTML file is not 100% perfect, a browser will usually still render something. That can be a comfort to us, but it also means that we cannot rely on the browser to tell us when our code is incorrect.
How can we know our web page is correct? Or that it will look the way we expect in the browser?
We can load our page into a browser and inspect it ourselves. We can use multiple browsers to increase our confidence. But this approach depends on us to check our work: it is both time-consuming and prone to error.
A helpful tool in checking the correctness of our code is a validator. As the W3C says:
Validation is one of the simplest ways to check whether a page is built in accordance with Web standards, and provides one of the most reliable guarantee that future Web platforms will handle it as designed.
You can read more on why validating matters on the W3C website.
The W3C provides an HTML validator as a free service for checking a web page against the rules of HTML. Another option is the Nu Html Checker. Both allow you to enter a URL to an existing web page to be checked. The W3C validator also has tabs that allow you to upload a file from your computer or to enter HTML directly into a text field.
The service attempts to parse your HTML and reports back on any errors or warnings, such as an element missing its closing tag. Validation doesn't guarantee correctness, but it's a useful first step.
To see how the service works, let's validate a couple of pages on the course website using the W3C validator:
The former runs clean: "Document checking completed. No errors or warnings to show." The latter contains three errors! We can fix them and improve the website.
TIL not to includeblockquoteelements inside ofpelements. It's right there in the name!
You will use the W3C's HTML validator as a part of Homework 2. I encourage you to use it on all of your pages, especially while you are learning. It can teach you about how HTML elements work.
Closing
Homework 1 is due tomorrow. Homework 2 will become available tomorrow as well. It asks you to create your first web pages from scratch.
The reading for Week 3 will go up by Monday morning.