Week 2
Telling Stories with Scratch
Weekly Summary
Last week you learned about two concepts of programming - algorithms and loops. This week you will add in an additional concept - events - by exploring the idea of coordinating multiple sprites to tell a story.
Key Concepts
Lessons
[Note as we start this week. My lessons this week include a set of non-graded tasks that I actually think will make your graded activity easier to complete by giving you some structured practice first. In them, you will start with a simple, two-character story that uses both timing (scene1) and broadcast messages (scene2). You will explore andmodify this story using the TIPP&SEE strucure as explained in the lesson. If you would like to work with a partner on this activity I am fine with that (I put students in groups of three when I use this in my live classroom). You will NOT submit anything for this activity to me. This is purely meant to give you some guided practice. Having said that, if you have questions, don't hesitate to ask.]
To start the week, let's recap what we did last week and frame that vocabulary to prep us for moving forward.
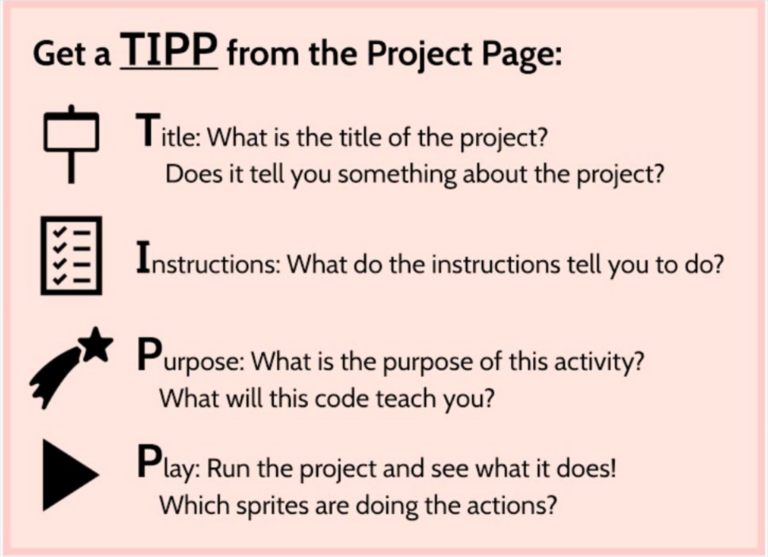
Code is a lot like human language. We are often able to read/understand much sooner than we are able to write/produce. This is especially true with a block based language like Scratch. One of the current frameworks for helping students become more aware of their own learning processes related to Scratch is a metacognitive strategy referred to by the acronyms of TIPP and SEE. This technique scaffolds with students as they learn from example Scratch projects. Let's begin this week by considering the TIPP portion. TIPP is all information that you can answer about a program by looking at the main project page for a Scratch PROGRAM. and it is a way to scaffold learning how to read and run a Scratch project. TIPP stands for:

Let's try this for ourselves.
- Navigate to the following completed Scratch program
- Using the information available to you on this Project Page answer the questions about Title, Instructions, Purpose, and Play from above.
At this point we are going to put the SEE part on hold until after we learn a little bit more vocabulary in the following video lessons.
- 2.2 - Setting up the right "Look"
- 2.3 - Base program for our knock knock joke
- 2.4 - Adding Sound Effects
- 2.5 - Changing Costumes
- 2.6 - Using Broadcast and Receive
- 2.EXTRA - Importing your own images and using remove.bg
- 2.EXTRA - Attribution of imported materials (Copyright, Attribution, and Educational Fair Use)
- 2.EXTRA - Controlling Speech Bubble Placement
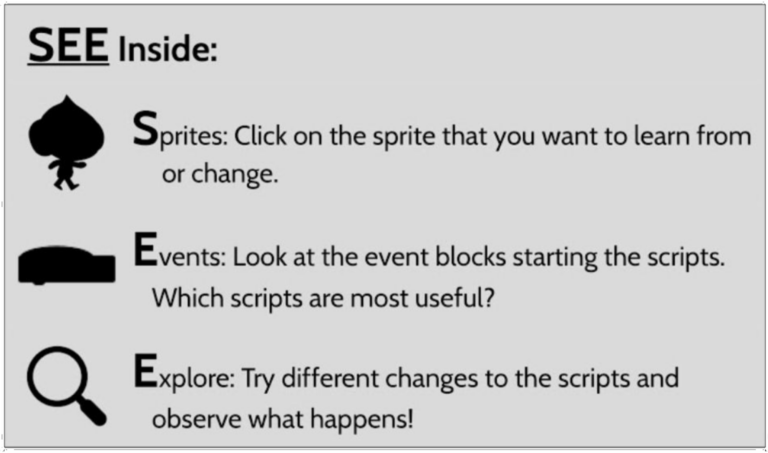
Now that you have learned a bit more vocabulary, let's finish up our process by considering the second part of TIPP&SEE. See stands for:

While the four parts of TIPP are often completed chronologically (one right after the other), the three parts of SEE are often done intermingled and in cycles of considering a sprite, looking at its events, and then testing increasingly larger changes.
To help guide you through the process the first time, apply SEE to our original Harry Potter story by using the following handout as a guide
Assignment
When you have completed the lessons for this week, please complete this programming activity.